
Popularized by legendary documentary filmmaker Ken Burns, the eponymous “Ken Burns Effect” is one of the most widely used video effects for still images. Originally, Ken Burns was inspired by the desire to breathe new life into old photographs. He believed that zooming and panning over a still image would add liveliness to old photographs by giving the sense that the stillness was in motion, and he was certainly right. The effect is one of the most popular effects to this day. So, why did Apple choose to hide the effect in Final Cut Pro X? Many users have been confused by the effect’s implementation because it does not appear in the standard “Effects” window pane. We can show you how to find where Apple buried the Ken Burns effect within FCPX.
How To Find the Ken Burns Effect in Final Cut Pro X:
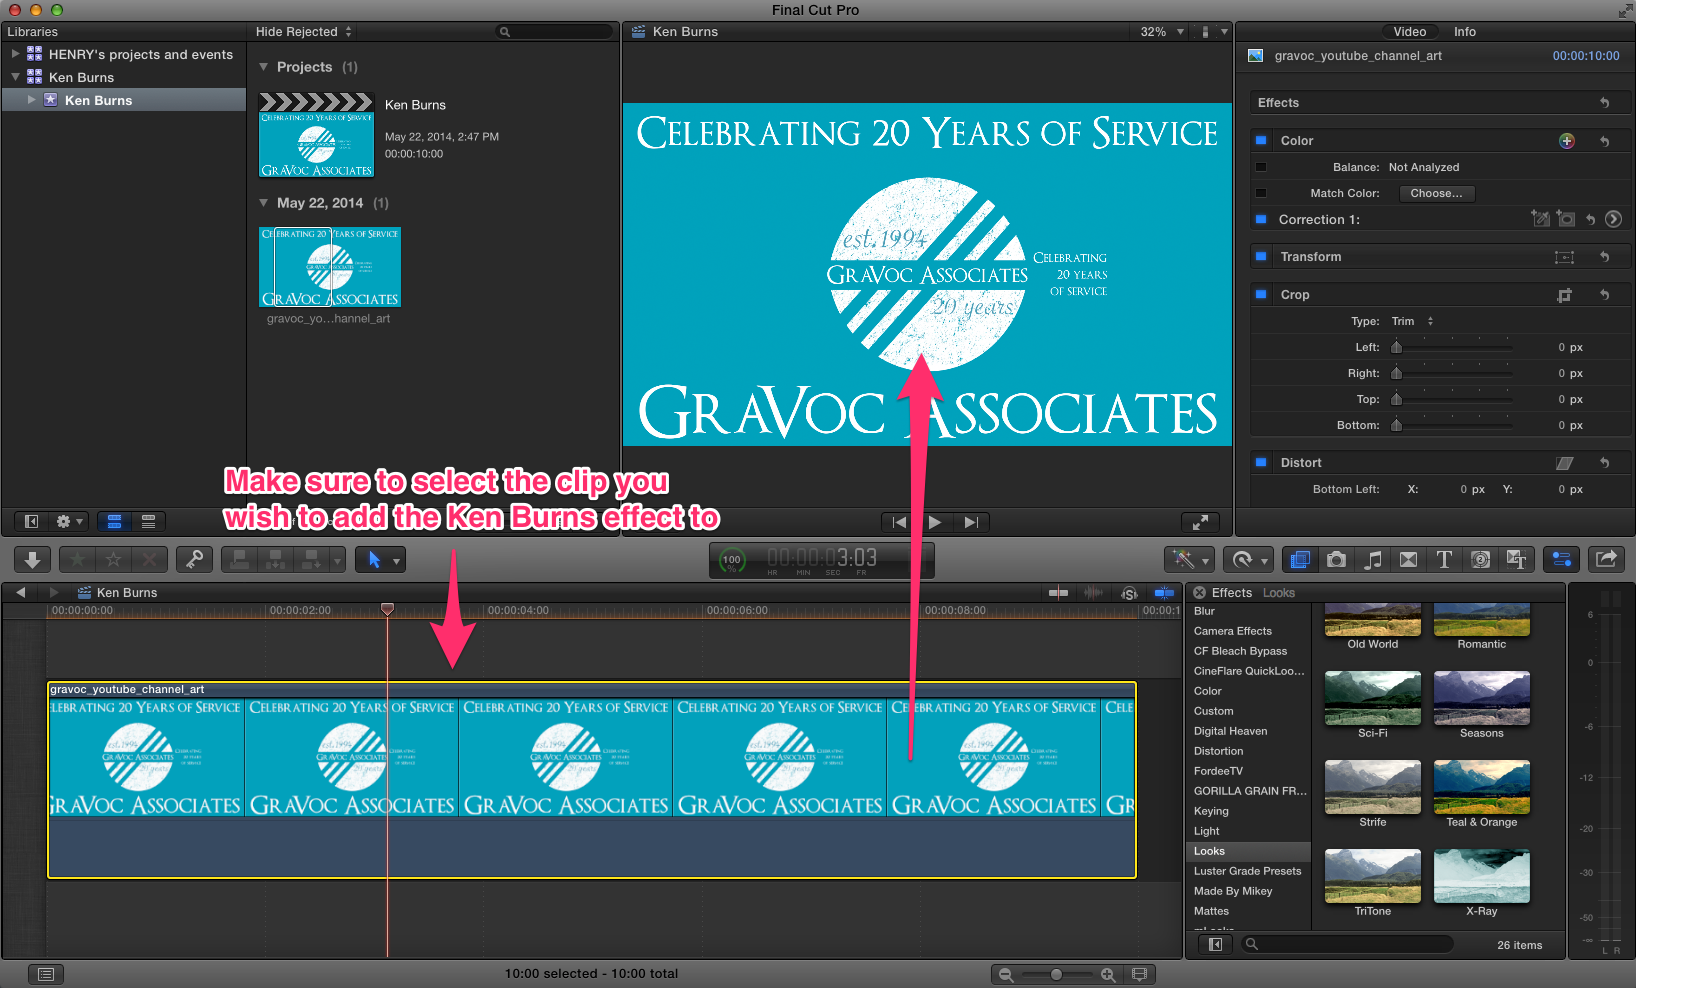
Make sure to select the clip you wish to add the Ken Burns effect to.
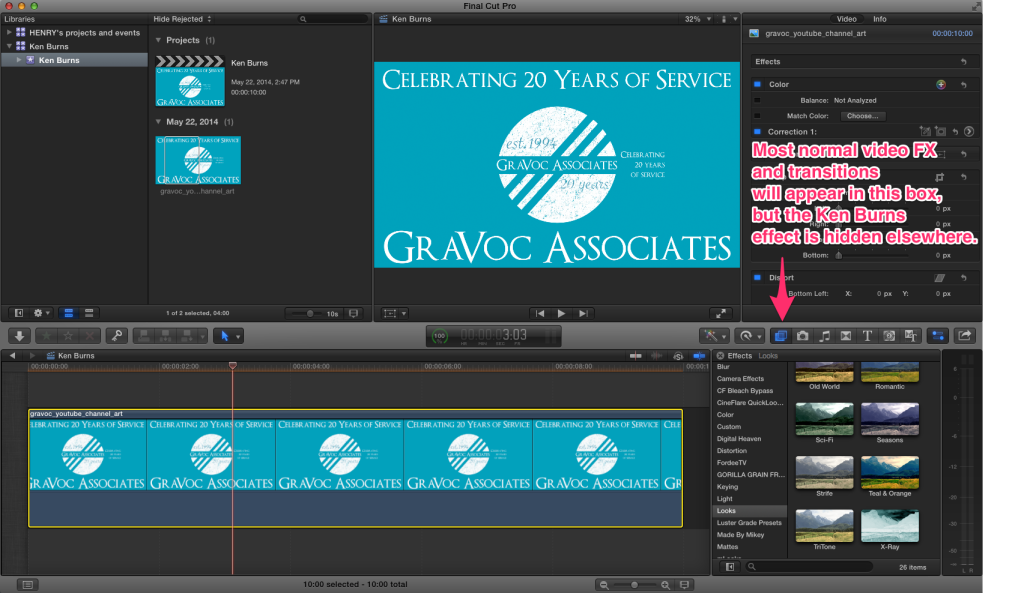
Most normal video FX will appear in this box, but the Ken Burns effect is hidden elsewhere.
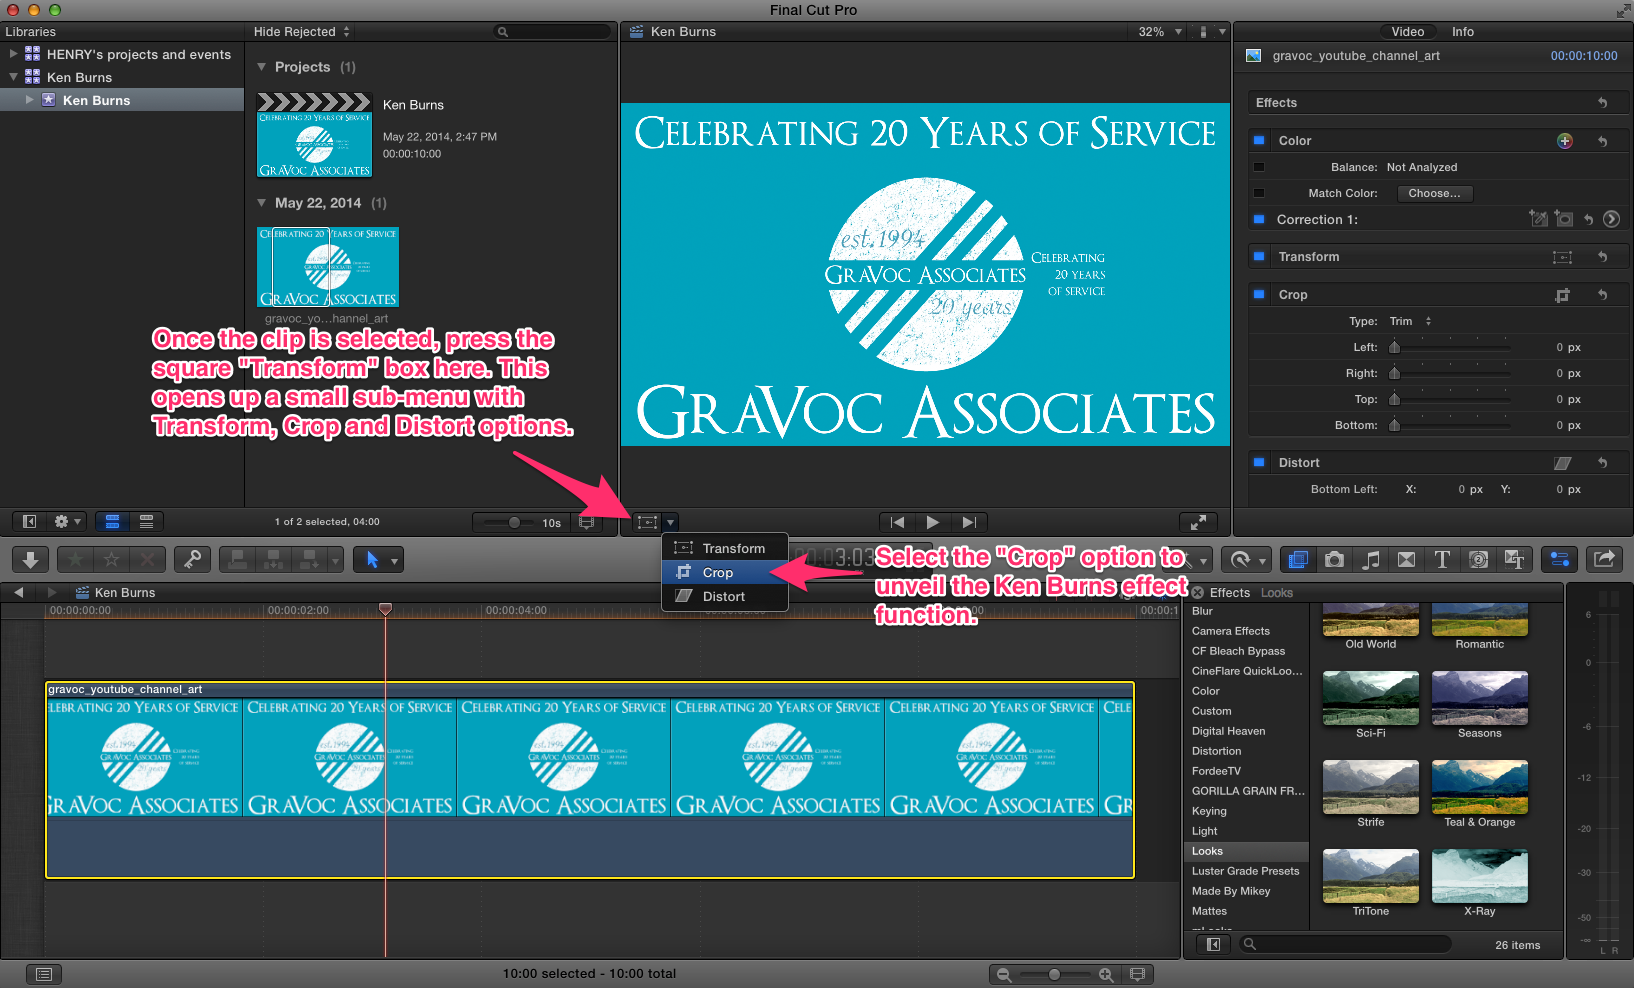
Once the clip is selected, press the square “Transform” box here. This opens up a small sub-menu with “Transform”, “Crop” and “Distort” options. Select the “Crop” option to unveil the Ken Burns effect function.
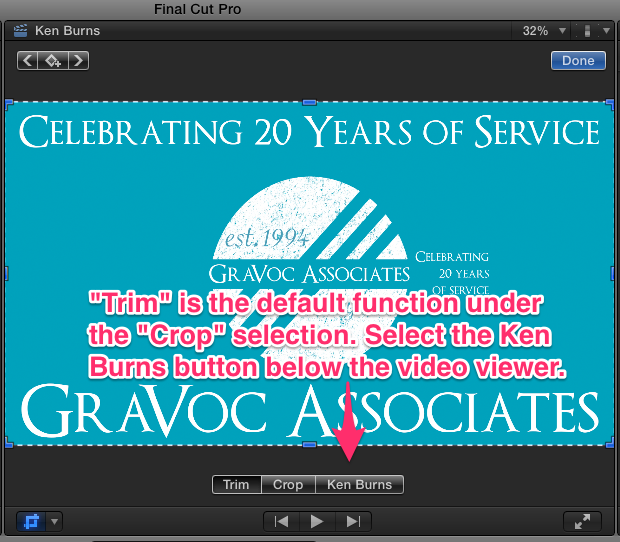
“Trim” is the default function under the “Crop” selection. Select the “Ken Burns” button below the video viewer.
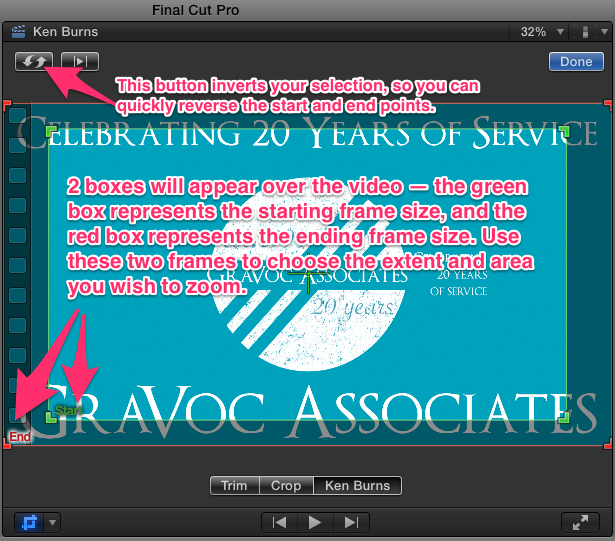
This button inverts your selection, so you can quickly reverse the start and end points. 2 boxes will appear over the video — the green box represents the starting frame size, and the red box represents the ending frame size. Use these two frames to choose the extent and area you wish to zoom.
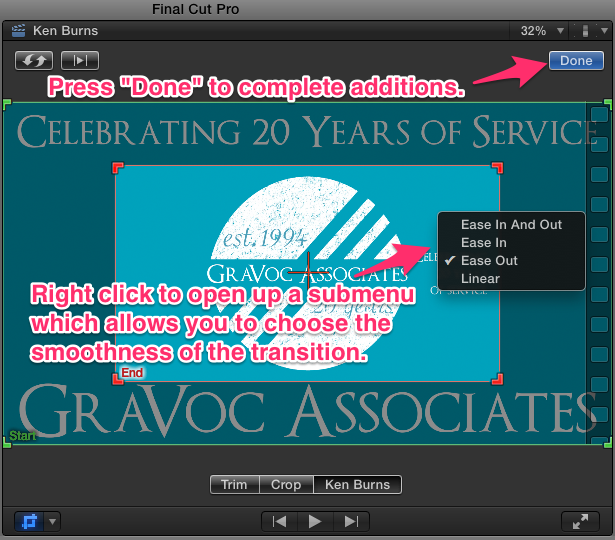
Right click to open up a submenu which allows you to choose the smoothness of the transition. Press “Done” to complete additions.
The Result:
And voila! Here is what the finished product looks like with a standard Ken Burns effect applied: